when someone has blonde highlights, they typically have a ton of different shades of blonde in their hair.

you can't just go out and buy one or two shades of blonde extensions and put that in the hair and expect them to MATCH.

what you need to do is you need to put a BLEND of all the TONES in the hair. the goal of extensions is that you don't want them to look like extensions. you want them to match exactly to their hair.

if you take a look at leah's hair here, we can see she has a lot of different tones in there.

i custom ordered hair through nvenn. we get 100% RAW EUROPEAN VIRGIN HAIR. it's such a beautiful hair. it's also a fine texture and it's naturally a super blonde color, so it's perfect for leah's hair and it's going to match her texture perfectly.

here is leah's hair BEFORE extensions, we can see a lot of different tones of blonde in there.

each track actually has FOUR WEFTS in it and each weft is actually colored a different color of blonde. we're STACKING them on top of each other.
the reason why i'm putting four tracks into every weft is because leah wants her hair to feel very FULL. she wants a lot of hair. you can customize this based on what your clients want and need with how full they want their hair to feel.
i'm going to be doing COLOR SWATCHES on pieces of the exact extension hair.
the reason being is that this extension hair may not color in the same way that leah's hair does, so in to ensure we're getting the SAME COLOR TONES, i want to make sure that we're testing out the colors we want so that we get exact colors we want in leah's hair.

we have a lighter blonde level 10 here on the right. then we have next to that a level 8 and then after that we have a level 9 and then after that we have a 7.
here are our extensions all LAID OUT ready to be colored in each track. we're going to have all four colors of blonde.

you're going to paint the extensions, making sure to fully SATURATE the extensions through to the other side.

you want to make sure to get all the hair including the WEFT, so the weft is also colored as well. we're going to completely paint the one side. then we're going to FLIP the extensions over and paint at the other side to make sure that all the hair is colored and we don't have any light bits peeking through.

now we're going to flip the extensions over. you can see on the back here that the color has not SATURATED through the other side.

we're going to lead to extensions down FLAT, made sure that the hair is sitting flat. that's the best way to give it an even color. next we're going paint the extensions on this side. making sure to fully saturate the extensions.

now we’ll EMULSIFY it together and COMB through it. we’re making sure that we definitely have color saturated throughout. starting on the bottom, work your way up. like any sort of hair combing technique that you do- don’t rip through the hair.

always remember to emulsify into the ROOTS

and we're DONE. you can see the color is super saturated and even we don't have any light pieces of extensions peaking through that have not been colored.

we have our four shades all colored in. now the reason why we're doing four shades of colors is because our client has tons of different shades of blonde. in order for this to match, we need to mimic what she has in her hair. so this is a 7 and 8 and 9 and that's the level 10 on the far right that we didn't need to color.

BEFORE washing, we've added some water and we're gonna just emulsify in for a couple of minutes before washing with shampoo and conditioner.
here are her wefts all finished and colored. now we're ready to put these together. i want you to take note here-

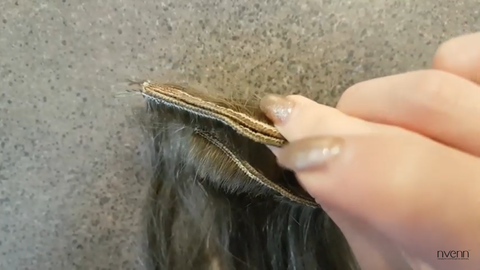
all extensions have a portion where the hair is sewn in underneath. you can see these SHORT BITS that kind of stick out. what you want to do is you want to make sure these shorter bits are on the INSIDE of all of your tracks.

since there's going to be four wefts in every single track, we have to use a special technique to sew these together so that the tracks are not too thick. i'm going to show you is a STAGGERING TECHNIQUE where we have one weft higher than the next one a bit lower and the one after that a bit higher and the one after that a little bit lower. the reason why we're going to do that is because it's going to keep your track as calm, packed and as thin as possible.

PROTIP: we want to keep this staggering pattern in the wefts while we're sewing them together. so what i'm going to use is a little bit of super glue just to hold the staggering pattern into the wefts. once we have the wefts all together, we’re now going able to sew this down with all four of them put together.
only put in a SMALL DOT of super glue to help you hold the weft together. we don't want to have super glue across the entire weft. this is just to help hold the weft together so that we can sew it the way that we want to after the first two are stuck together.

now we're going to be putting the third one on. we're going to be attaching this to the HIGHER weft, which is the very first weft.
what that's going to do is keep everything really nice and COMPACT here and where you take a look at the top here. instead of you seeing three wefts, you see only two.

now it's time for the fourth weft and this is going to be STAGGERED a little bit lower now at the same level as the second weft.

with that all finished, we can see now that this is all held together nicely. we have our whole track here and we can see now this is the THINNEST we are going to be able to make these tracks having four wefts in each little track.

the needle i'm going to be using is a CURVED EMBROIDERY NEEDLE. it makes it a little bit easier to sew through the wefts of they extensions. we’ll start by putting in a very TIGHT KNOT. we’ll create about five knots to make sure the hair does not get pulled through the weft.

we're going to be using a 100% POLYESTER THREAD because it is a stronger thread. so it's not going to break in the extensions because we want to make sure that these last.

we're putting in our first stitch. so you're gonna first go through the two HIGHER WEFTS, which is weft number 1 and number 3.

now when we're moving the needle and back around, we're going to be going through the LOWER WEFTS. so now this is going to be with number 2 and 4.
we are going to continue on with the same pattern and finish off the track of hair. first going through the top two higher wefts. then next going through the bottom two lower wefts and then alternating until we're done the entire track of hair.
once we get to the end of the track, again, we are going to put in SEVERAL KNOTS to make sure that it isn't going to come loose. i would put in, three to five knots onto the end of this to make sure and make sure that the thread is very nice and snug, very close to the weft so that we don't have that not moving around or does it feel loose at all.

now we are done and ready to put this into leah's hair. so take a look at these.

on the bottom we have the level 7, then we have the level 9.

on top of that, we have the level 8 and on the very top left it's going to be the lightest blond, the level 10.
let's test it in her hair to make sure the color matches well - and it looks PERFECT.

to take a look at this extension technique, go to the link in the description and we will tag it in this video here so you can check out the technique.

there you guys have it . that's how we did leah's extensions. blending those four tones together created the perfect look for her extensions so that her hair matches the extensions perfectly.

try that out for yourself. if you have any questions, leave a comment below, we'll make sure to answer them right away for you.
go check out our products on www.nvenn.com. they are amazing products for extensions, for repair. we actually give away free products every single month at nvenn.com/giveaway. so go there and enter.
and of course don’t forget to hit that little subscribe button. we put out new videos every friday. guys, we love you. thanks for being a part of the community and we'll see you guys next friday!
Comments will be approved before showing up.


