
there’s nothing quite like that FRESH from the salon color. unfortunately, the day after your salon appointment starts the age old color problem: HOW TO KEEP YOUR HAIR COLOR FROM FADING.
the major downfall of COLORING YOUR HAIR is maintaining the color. black hair fades the least, follow by blondes (the color itself won't fade but the town will) browns are next, and reds are the worsts with a quick fade that requires the attention. funky colors lead the fading race and will require more than a touch-up appointment every 6 weeks.
so let’s take the time to answer the #1 problem people with artificially colored hair face: FADING. in this blog, we’re going to show you 3 WAYS to KEEP YOUR HAIR COLOR FROM FADING.

before we dive into protecting your hair color, we need to address a very important aspect of COLORING YOUR HAIR:
YOU NEED TO HAVE HEALTHY HAIR BEFORE DYING IT! no matter what you're told, color will not last on damaged hair. damaged hair will always fade quicker than healthy hair.
NEED to REPAIR DAMAGED HAIR? start with a good shampoo and conditioner that has protein in it. use in your hair 1 or 2 times a week. replace your conditions with the protein mask and let it sit on your hair for 5-10 minutes before rinsing it out. whatever you do, DON’T sleep in your protein mask overnight or use it daily. overloading your hair can make it too heavy and cause your hair to break.
now that we’ve got that covered, let’s talk about MAKING HAIR COLOR LAST.
hot water will KILL your hair color. the CUTICLE is the protective layer of your hair that locks in color molecules. when you wash your hair with hot water, the cuticle opens up and allows YOUR HAIR COLOR TO LEAK OUT OF YOUR HAIR.
so to KEEP YOUR COLOR VIBRANT you need to use cold water. COLD water seals the cuticle and locks in your color. the colder, the better. don’t make yourself sick in a cold shower, but do your best to wash your hair with ICY COLD WATER. keeping your cuticles tightly sealed also makes your hair shinier and gives it a smooth surface to reflect off of.
SULPHATES are hidden in hundreds of hair care products. these cheap cleansers are ULTRA HARSH on your hair and strip the color faster. SULPHATES are found in the same common household cleaners you can find on your closet. just think about it: why would you ever want to put that on your hair?
get a SULPHATE FREE SHAMPOO to wash your hair with. quality cleansers like our WASH doesn't suds on your hair and is gentle on scalp and hair follicles.
did you know the pH level of water is high enough to STRIP THE COLOR OUT OF YOUR HAIR? the more you wash your hair, the MORE YOUR HAIR COLOR WILL FADE. try to reduce the amount of times that you wash your hair in a given week.
you may experience some excess body oil, but don’t worry! as your body gets used to it’s new washing schedule, the oil production will slow down. in the meantime, keep your hair looking fresh with nvenn’s CLEAN on the days you don’t wash. not only will it deodorize your scalp, it will absorb light grease and fresh your hair.
you may event want to consider other factors such as sun exposure and water quality. if you're living in the sunshine or staying extended hours, it's going to damage your hair. in the same way, salt water from the ocean or waters with different pH levels can strip the hair color. yes, we know you aren't going to wash your hair in salt water... we're just reminding you to protect it :)
at the end of the day, there is no such thing as everlasting hair color. you can prevent your hair from fading quickly, but you’ll still need to see a stylist every 6 weeks to refresh your roots and show your hair some love.
as always, feel free to ask us any hair care questions you may have in the comments :)

we’ve all had the nightmare of SPLIT ENDS. these devastating splinters in our hair signify HAIR DAMAGE and frustrating knots that are virtually never-ending.
the result? not only do split ends hinder the growth process, they don’t stop splitting and begin to DAMAGE THE REST OF YOUR HAIR.
this is especially FRUSTRATING when you’re trying to GROW YOUR HAIR OUT.
so before we answer the question HOW TO GET RID OF SPLIT ENDS, we have to know WHY they occur. as hair begins to lose it’s moisture and protective oils, the ends of your hair begin to split. meaning that your hair is literally separating into 2 (or more) fragments.
 take a look at the picture to the left. SPLIT ENDS and DAMAGED HAIR are 2 different things but point to the same tell-tale sign: your hair isn’t healthy. the EASIEST way to PROTECT HAIR FROM SPLIT ENDS is staying dedicated to a preventative hair care routine. after all, you won’t have to worry about split ends if you simply aren’t getting them. follow our hair care routine to PREVENT SPLIT ENDS and nourish your hair
(image source: hairfinder)
the BEST WAY to get rid of SPLIT ENDS? with a killer HAIR CARE ROUTINE!
but BEFORE YOU START, you’ll need to make sure that you make an appointment with your stylist to CUT OFF YOUR SPLIT ENDS. if your hair is already full of split ends, the realistic next step is making an appointment to get a trim.
REGULAR TRIMS will prevent further damage in your hair. the BIGGEST part of getting rid of split ends is regularly removing the split ends you couldn’t prevent.
though there are plenty of ways to STOP SPLIT ENDS BEFORE THEY START, there are few permanent
plus, who couldn’t use that FRESH from the salon in their life a little more often? ;)
if you’ve sat in our chair or asked for advice on your hair, chances are you’ve heard us mention this before. washing your hair every day strips your hair of it’s natural oils and it makes it more difficult for your scalp to repair your hair.
the more you wash… the more your DRY. which affects more than just the health of your hair. if you’re rocking a vibrant color or trying to maintain blonde hair, you’re going to have a very difficult time keeping your hair bright and healthy.
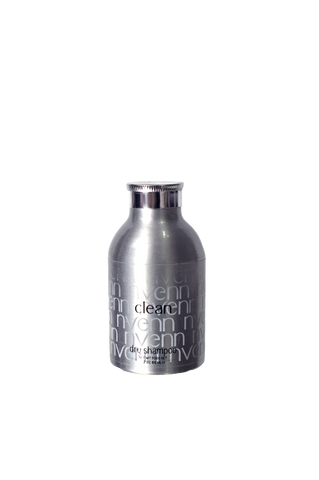
try using a DRY SHAMPOO if the texture or oils in your hair are bothering you. within a few weeks, your hair will adjust to the new wash cycle and reduce any excess oil production.
when it comes to your SHAMPOO, make sure that you’re using a low-sudsing formula that doesn’t include sulfates.
SULFATES are incredibly harmful to hair and suck the moisture straight from the strand. to get the best for your hair, invest in an all natural formula. although they make be more costly than your average bottle of shampoo, there is a lot more VALUE in each individual bottle.
trust us,your hair will thank you (and you’ll spend less on hair repair products).
remember to avoid clumping and crisscrossing the hair on your head. let the hair fall naturally and lather shampoo on the scalp, while encouraging the shampoo to ‘melt’ down the hair.
conditioner is an ESSENTIAL part of any hair care routine, especially for those of us who are using heated styling tools on a day to day basis. make sure that you choose a wax-free conditioner with moisturizing oils to aid your hair in the fight against split ends.
WAX creates a layer of build-up that creates a barrier, blockading any moisture from getting into your hair.
look for conditioners that are WEIGHTLESS and SEAL IN MOISTURE.
ironically, HEAT PROTECTANT is one of the least used products for being such an essential part of ANY hair care routine. in addition to the daily damage of styling your hair, excessive sun exposure and other heated situations DRY your hair out.
so make sure you always use a STYLING PRIMER than can protect your hair from the blowdryer to the curling iron. as always, choose products with natural ingredients that won’t damage your hair (or your health).
NO PARABENS, NO SULFATES, & NO PHTHALATES. those harmful chemicals are detrimental to the health of your hair and more often than not make SPLIT ENDS WORSE.
WET HAIR is incredibly vulnerable to damage. when you use fine tooth combs or brushes on your hair fresh out of the shower, you’re asking for rips in strand and splits on your ends. to avoid as much damage as possible, USE A WIDE-TOOTH COMB ON WET HAIR.
REPLENISH OIL is the best way to rejuvenate your hair and nourish DRY or DAMAGED HAIR. rich in replenishing oils and moisture, this oil is applied to the ends of your hair and blow-dried into the hair for nourishment.
not only can it help PROTECT AGAINST SPLIT ENDS, it helps strengthen your hair :)
you can find REPLENISH OIL in our 9-1-1 HAIR RESCUE KIT. if you’re trying to recover from damaged hair, you can watch your hair recover and become softer and shinier EVERY DAY.
snag yours HERE.
at the end of the day, NOTHING CAN REPLACE YOUR STYLIST. if you’re not getting regular trims and following a nourishing hair care routine, you’re asking for DAMAGE and SPLIT ENDS.

today we're talking about a problem every blonde has faced: BRASSY or ORANGE TONES that RUIN YOUR BLONDE HAIR.
the #1 question we're asked as BLONDE SPECIALISTS is:
HOW DO I GET RID OF ORANGE TONES?
we typically respond by asking: was it orange when you left the salon?
if the answer is no, you're missing VITAL STEPS in your HAIR CARE ROUTINE. no matter how flawless your color is when you leave the salon, it's bound to brass overtime. to protect your hair and keep your PERFECT BLONDE HAIR, follow our hair care tips!
(note: if it was brassy when you left the salon, it's time to find a new stylist. )

follow these 5 tips to keep your blonde hair BEAUTIFUL in between salon visits :)
when orange and yellow pigments appear and begin to create brassy tones in the hair, stylists put toners on to neutralize it. this happens to ombres, sombres, balayages and every rooted blonde in between.
ALL BLONDES need to refresh their toner. the process of TONING YOUR HAIR is almost identical to dying and needs to be treated as such. typically, other colors begin to appear within 4-6 weeks. make sure you're refreshing your toner at least every 4-6 to keep your blonde hair glowing and bright.
when it comes to your hair, you're going to get out what you put in. SULPHATES DAMAGE BLONDE HAIR by stripping the toner and stressing the cuticle. cheap shampoos and chemically loaded hair solutions have tons of astringent chemicals that damage hair. YOU'D BE SHOCKED by what you can find in common haircare products and appalled to learn that they have a lot in common with household cleaners.
take a moment to imagine washing your hair with Mr. Clean... what a nightmare! avoid the excess build-up, damage, and brass makers by buying SULPHATE-FREE HAIR PRODUCTS. not only will it keep your hair looking picture perfect longer, it's healthier for your hair in the long run.
YOUR HAIR IS LIKE A STRAW. when it's healthy, it locks in moisture and can pass fluid through it effortlessly. once the straw has been bitten or chewed on, the straw gets holes in it. now it's impossible to pass liquid and it's leaking from the straw.
now apply that to your hair. the holes in the straw represent the color leaking from your hair. that's what happens when YOUR HAIR IS DAMAGED. flat irons and heating tools, bleach jobs, and even extended sun exposure can damage your hair further.
ALWAYS USE MOISTURIZING CONDITIONER and USE A HEAT SHIELD when styling your hair. the proteins in moisturizing conditions help add a protective layer on your hair that creates a buffer zone between you and your heat tools.
#HAIRHACK: put a new layer of heat protector on before every styling session. before you blow dry, put on a quick layer. then apply again before you use a flat iron.
PURPLE SHAMPOO IS A BLONDE'S BEST FRIEND. if you've watched our videos or read our other blogs, you know how much we LOVE purple shampoo. this magical shampoo will help maintain your color and DEFEND YOUR HAIR FROM BRASSY TONES.
there's no real rule on how often you should use purple shampoo. it's a lot more like instinct. after you apply the shampoo, leave it on your hair for a minute before washing.
NEW TO PURPLE SHAMPOO? if your hair isn't ashy enough, use it every other wash and leave it on for a minute. if you're unsatisfied with your results, leave it on a little longer (or vice versa). we recommend mixing PURPLE SHAMPOO with your REGULAR SHAMPOO instead of shampooing twice.
PROTIP: don't over do the purple shampoo. using too much purple shampoo can cause your hair to turn purple! use it with caution.
whether you're seeing the wrong stylist or attempting to dye your own hair, there's nothing that can replace a HIGHLY TRAINED STYLIST. in addition to making sure your stylist can address your type of hair, try to find a stylist that relates to your personal style. for example, if you're looking for crazy neon hair you're going to need a stylist who is knowledgeable in FUNKY COLORS!
are you struggling with BRASSY TONES in your BLONDE HAIR? ask for advice in the comments, we'll do our best to give you a solution (if it's not already featured above).

if you’re a professional stylist, it’s vital to have healthy hair. you can’t give advice to clients if your hair is damaged, dry, and ratty. think about it: that’s like a dentist with bad teeth. you wouldn’t trust them to clean your teeth.
that means if you’ve got a hair emergency, you need to fix it- and fast. which is exactly what inspired our latest video and blog: 3 tips for CUTTING YOUR OWN HAIR AT HOME
DISCLAIMER: do not try this at home! we’re heavily trained stylists with over a decade of training. most professional stylists won’t cut their own hair! consider this blog post an informative guide to understanding a good haircut (or finding a good stylist).
remember last week’s video on color ombre hair at home? The first and most vital step to coloring or cutting your hair is getting organized. section and part your hair very evenly. you need to have a clear visual of where you’re cutting and how the hair is falling.
not only will this simplify the process of cutting your own hair, it will be easier to cross-check the hair to see if it matches. (we’ll talk more about cross-checking later.)
P.S. in last week’s video, we showed you how to section hair. check it out here if you need a refresher.
before you grab the shears, take the time to visualize the style you’re going for. ask yourself:
everything makes a difference when you’re cutting hair. from the style, you plan the method you’re using to cut. how are far are you holding the hair from the head vertically? horizontally? will you be pulling it forward or pulling it back?
**for the hair lovers and clients reading, this is largely why you want to see a professional stylist. there’s a lot that goes into planning a haircut.
don’t make the mistake of waiting to check your hair until the end. you don’t want to progress through the hair cut and realize you’re a quarter inch off only to end up an inch off on the other side. the further you progress with a faulty measurement, the harder it is to recover from.
compare each section you complete and use guidelines regularly. the more you measure, the easier it is going to be to cut your hair.

there’s no imitating a good stylist and no 10 minute video or blog post that can teach you how to cut hair. similarly, there’s no excuse for bad stylist. everyone deserves the PERFECT HAIRCUT.
we’re not suggesting you call your stylist out but try to pay attention to his or her’s methods.
are they using the techniques we showed you during this video? more importantly: are they asking questions about your hair? a stylist should ask how your hair grows, the common problems you have with hair, how you want to style your hair, and much much more.
don’t settle for anything less than the best!
as always, feel free to leave your questions in the comments :)

in this blog, Veronica is saying goodbye to her mermaid pink hair and we’re LIGHTENING HAIR TO BLONDE. though the pink is a beloved color, it takes a lot of tender love and care to remove from your hair.
luckily, Jessica was able to dedicate the love. despite how easy she makes the process look, it took 9 hours to complete our hair!
we’ll walk you through the process and give you a few tips and tricks for LIGHTENING HAIR TO BLONDE
(and toning it, too!)
we highly recommend Pravana artificial color remover
(featured in the video above)
before you rinse, you should be able to see where the color remover has eaten out some of the color.
in our case, we’re rinsing the color remover after one process of 20 minutes.
**keep in mind that color remover isn’t a cure-all. it won’t return your hair to its natural color nor will it make your hair blonde. it’s core function is releasing artificial pigments from your hair.
now it’s time to LIGHTEN HAIR TO BLONDE.
we have lightener + 30 volume on anything that was a pre-existing black and lightener + 20 volume on anything that was magenta. this helps evenly lighten the hair to the desired level.
consider the different levels of your hair. adjust your volume as necessary to your color.
you should be able to see that the majority of the color is lifted out.
in the video, you can see that there is barely any hue of pink left by the time we move on to the lightening portion of coloring Veronica’s hair BLONDE.
you’re going to develop a bleach cocktail. well, not exactly.
it’s more like mixing 1 parts bleach to 3 - 10 volume parts developer.
massage the bleach in the pastel pinks in order to strip more of the artificial color out before moving on to coloring.
allow the bleach to lighten and remove color. you will do this visually when the hair reaches the desired shade (dependent on how healthy the hair is and how much lightening it can handle). depending on the color you may need to do more than one process.
once you’re done LIGHTENING YOUR HAIR, rinse the bleach ‘cocktail’ out and dry your hair.
make sure you use a heat protectant on your hair before blowdrying the hair and using hot tools.
prepare to color!
now it’s time to dive into color your hair. in the video, you can see that we’ve foiled the hair and colored it according to our needs.
after we dried Veronica’s hair, we decided that we decided to put a 6 over our original 7.
we also put toner on the ends of the hair. however, we don’t advise this unless you’re a professional stylist.
you must be extremely careful during the application process, as not every dye job will allow you to color and tone at the same time.
make sure you periodically check the foils and make sure that your hair is lightening well.
depending on the shade you’re trying to LIGHTEN YOUR HAIR to, you may need to use various different toning colors in order to attain the shade you want.
here are 2 quick tips to remember when TONING YOR BLONDE HAIR:
…and now for the BIG REVEAL:

as always, keeping BEAUTIFUL BLONDE HAIR comes down to taking care of your hair.
consider sulfate-free products that protect your blonde hair and try to avoid damaging your hair at all costs! no matter what color you choose, proper hair care can be the difference between monthly colors and bi-monthly salon visits.
(hint: our 9-1-1 hair rescue kit is the perfect companion for beautiful blonde locks ☺ )
are you thinking of trying a NEW COLOR for the NEW YEAR? tell us your hair plans in the comments.
P.S. we’re also accepting blog and video ideas for the coming year ☺ so if you’ve ever wondered how a certain hairstyle or dye job is done… now’s the time to ask!

looking for that perfect ASIAN ASH BLONDE OMBRE HAIR? you're in luck! during this awesome tutorial blog post, we're going to connect you with the techniques you need to get the perfect ash blonde (without losing your mind in the process).
watch the video, read the post, and let us know if you have any questions :)
there are 2 big complaints we hear from fellow stylists and clients about getting perfect ash blonde hair on
let's start with the first problem.
what exactly is brass? brass is unwanted red, orange, and yellow pigment in the hair. that doesn't mean that warm colors are hated. in fact, it's quite the opposite.
artificial reds, oranges, and yellows are very pretty. as stylists, we often suggest to clients reds, coppers, and golds.
brassiness occurs when the raw pigment of red, orange, or yellow remains in the hair. to create the perfect ash blonde ombre, you need to remove as much of that pigment as possible. the less underlying pigment that is left behind, the easier it'll be to tone out.
to prevent the second problem, proper after-care will relieve damage. it's also important to note that the
most
blue is always the first pigment that is exposed when we lighten hair. then comes red, orange, and last is yellow.
we recommend using 20 volume hair developer. the reason you want to use 20 volume as opposed to 40 volume is pretty simple. we're going to use the analogy of a deep spring cleaning vs. a quick power clean of your house.
a lot of times when we're going from black to blonde, we think we need to call in the heavy artillery and use 40 volume developer. but what we don't understand is that 40 volume developer is extremely harsh. it blasts the cuticle, opens it wide, and just does a very superficial removal of underlying pigment.
20 volume developer takes a bit longer and is slower, but it's much more like spring cleaning. you don't just wipe the floors and call it a day! you move the couch, dust things, go through the closet, and deep clean your home. it may take a little longer, but in the end- it's a much deeper clean than any power cleaning session.
IT MAY WORK A LITTLE SLOWER BUT IN THE END, YOU HAVE A MUCH DEEPER CLEAN.
in the event that time isn't on your side, we still don't recommend using a 40 volume. sometimes it makes more sense to lighten your hair slowly over time during a few sessions rather than in 1 sitting. using a harsh developer will leave your hair in a very fragile state.
we recommend lighting the hair 1 level lighter than you want to finish at. this will ensure all the unwanted underlying pigment is removed.
neutralizing your hair comes back to basic color theory.
when you're in kindergarten and they're teaching you how to finger-paint, you likely learned about 3 primary colors.
RED, BLUE, YELLOW.
from those colors, you can make secondary colors and tertiary colors, as well as complimentary colors.
complementary colors are hues that are opposite one another on the color wheel. these colors are responsible for neutralizing hair.
for example, if you have a yellow pigment in your hair that you're trying to get rid of, you want to use a violet shade to neutralize that pigment. violet is opposite yellow on the color wheel. you can apply that concept to every color, orange to blue etc.
what's important to understand is that
when it comes to toning your hair, you don't want to leave the toner on for less than 20 minutes. ideally, you'll leave it on for 30 minutes. the longer you leave it on your hair, the more neutralizing that's going to happen.
before you jump into toning your hair, make sure you dry it a little bit. think of your hair like a sponge. you wouldn't try to clean up a big mess with an old and dry sponge, that would take forever to absorb liquid, nor would you use a soaking wet sponge that's already fully saturated with water. you'd use a damp sponge.
don't dry it completely, just get out some of the excess water. damp hair will absorb the toner the BEST.
APPLY TO THE BRASSIEST AREAS FIRST. it's very rare to be working with virgin hair these days so the chances that the hair will lighten evenly roots to ends are slim. likely you'll have
you've controlled, neutralized, and attained beautiful ash blonde hair. now it's time to think about taking care of your beautiful locks.
don't use shampoos and conditioners that are astringent. believe it or not, there are a lot of shampoos that have the same chemicals as MR CLEAN cleaning products. using those harsh cleaning products is going to strip your hair of
send your clients home with a moisturizing shampoo, a protein-rich conditioner, and a purple shampoo.
purple shampoo combats brassiness. used in combination with your regular shampoo, it'll keep your locks luscious.
as some purple shampoos are more pigmented than others, we always suggest to leave it in your hair for at least 30 seconds.
(we recommend to start with leaving it on for a minute and adjust it accordingly. it's actually a pretty visual process. keep your eye on it and decide how you like the tone of your hair. if you want your

when you’re busy at the salon, there isn’t always time to do your hair at work. worse yet, there isn’t always someone to do your hair for you! the solution? learn how to color ombre hair at home with nvenn’s DIY OMBRE HAIR TUTORIAL.
one should have to suffer with dull hair! use our quick ombre hair brightener to get VIBRANT HAIR in 3 easy steps.
NOTE: we do NOT suggest you try this unless you’re a professional stylist. this video is specifically for colors like veronica’s.
in the video: Veronica is going to show you how we refresh our OMBRE HAIR AT HOME. all you need is your brush, gloves, cape, and the desired color. depending on your goals this could be a permanent, semi-permanent, wash out color, or direct dye. we won’t be doing any lightning, because that can be disastrous to do on your own. in this video, we’re simply showing you how to keep your ombre hair bright and vibrant when you don’t have the time to color your hair at the salon.
coloring your own hair is tricky. luckily, we’ve got your back :) we’re going to break down the steps of coloring your ombre hair at home into 3 simple steps.
let’s dive in.
SECTION THE HAIR into 4 sections. start from your part and split your hair directly down the middle and divide the two sections vertically in half. try to separate the hair as evenly as possible. it doesn’t have to be perfect, but you don’t want to have large chunky sections and tiny sections. (trust us, things will get messy.) when you’re done, it should look like this:

this is going to keep your life SIMPLE, EASY, and ORGANIZED while dying the hair. now that you’re all sectioned off, it’s time to dye.
wrap up in your handy-dandy cape and grab a pair of gloves. you’re going to want to start from the back and only work on one section at a time.
take thin enough sections so you know that the color has saturated the hair. as you approach the sections near your face, start at the top so that you are able to flip the hair back as you work and not worry about it again.
AVOID COLORING THE LIGHTER ENDS OF YOUR HAIR WITH THE DARKER COLOR AT ALL COSTS. for this color specifically, we do not need to color the ends. the rinsing process will bleed the color down and refresh the lighter color. depending on the type of color you have, you may want to recolor the ends with the appropriate shade to refresh it.
a few things to remember when dying ombre hair at home:
once the waiting game is over, it’s time to rinse your hair. MAKE SURE THE WATER IS ICE COLD. warm water kills hair color and touch-ups are no exception. there’s no specific washing pattern you need to follow, just shampoo the roots.
do not shampoo the colored portions if you want to stretch the life of your color.
note: if the ends of your hair are white or another extremely white color, it will require an entirely different washing pattern.
congrats! you’ve got the knowledge you need to brighten your OMBRE HAIR AT HOME. as always, feel free to ask questions in the comments :)
P.S. don’t forget to watch the video! there’s a special ninja hair hack you can use to transform faded color into beautiful ombre hair.
Have you ever taken a photo in to the hair stylist and asked how to style hair that way? Of course you did. Pending that your hair stylist was talented enough - once they finished, you hoped your hair looked the way you had envisioned. Leaving the salon with the right hair is half the battle. Now recreating it on your own at home, is the other half.

So what is the secret formula to create the hair style that you always wanted? It comes down to 3 things. With those three things in line, you can recreate anything.


 2) pony tails - Pigtails

 3) 70s inspired waves
 4) Natural texture
 5) Braids

 6) Messy buns
 7) Twisted hairstyles
 8) Super sleek hair
 Now get inspired and get creative. We aren't saying these styles are the end all be all. Use them as inspiration for your own hair styles. The best part about hair is that it can look different everyday.
 2: the choppy fringe
  3: bobs and lobs... real and faux
  4: buzz cuts
  5: deep side parts
  What we love most about people is their creative ability to take something and make it their own. Let's be real. Everything has been done before by someone else somewhere along the way. Take looks that inspire you and make them your own. BE DIFFERENT. BE UNIQUE. BE YOU.
 So let's talk about what makes great hair. It goes beyond what we usually think of on the surface which is just how my hair is cut and how my hair is colored. It is healthy hair, shiny hair, smooth hair, strong hair. It most importantly is BEAUTIFUL HAIR, from the inside out.
  I often have had clients that will shed no expense to get their hair to the desired color or length. To give you an example, think of the 'never blonde enough' client that will bleach (and bleach, and bleach) her hair to get it to a certain shade and paying no attention to how much damage it is causing. Also, the person that refuses to cut off split ends to preserve length (even though it looks like their hair went through a cheese grater). This hair DOES NOT look nice. If your hair is destroyed, it looks ratty, unkept, dull, and lifeless. On a windy day, beware, because the wind may just be strong enough to break that distressed hair right off. Having just blonde hair, red hair, long hair, wavy hair, etc. is not enough. You want to have hair that shines and grows. Healthy hair, beautiful hair, and shiny hair is the key to GREAT hair. So how do we get there? There is a way to give you the hair you have always wanted and deserved, whether it is the whitest blonde you have imagined or long mermaid hair. I believe in having no limits when it comes to hair and beauty. We can do anything we want to do, if you respect the hair gods and what they are willing to provide.

 2) The second trending hair color are the deep brunette hues. These brown haired beauties really have sultry sex appeal. (The first photo is from Dolce Gabbana's collection. The second photo is from Balmain's collection.)
 3) The third color that lite up the runway was the golden goddesses. These soft blondes were just mesmerizing to our eyes. (The first photo is from Anna Sui's collection. The second photo is from Roberto Cavalli's collection.)
 4) Another trending hair color to hit the catwalk were the fiery copper tones. Any of these red heads definitely turned a few faces for a double take as they walked by. (The first photo is from Bora Aksu's collection. The second photo is from Kristian Aadnevik's collection.)
 5) Lastly, the last trending colors we noticed were the pastel and grey colors. It looks like these colors will be here for at least another season. We can't deny how good it looks. (The first photo is from Giamba's collection. The second photo is from Louis Vitton's collection.)
 Take these 2016 spring hair color trends into consideration while you are thinking of your next new do.


